
An administrator managing a fleet of devices with an MDM/EMM solution wants all the devices they manage to be uniform, if possible. Of course, this desire does not quite match real-life scenarios. If the managed devices are not kiosk devices and are used by real people, each user will use their device with a certain level of personalization. This results in a device fleet with devices that are out of line.
By creating a compliance policy that includes certain key functions for such situations, we can take action when the devices we manage fall outside of compliance.
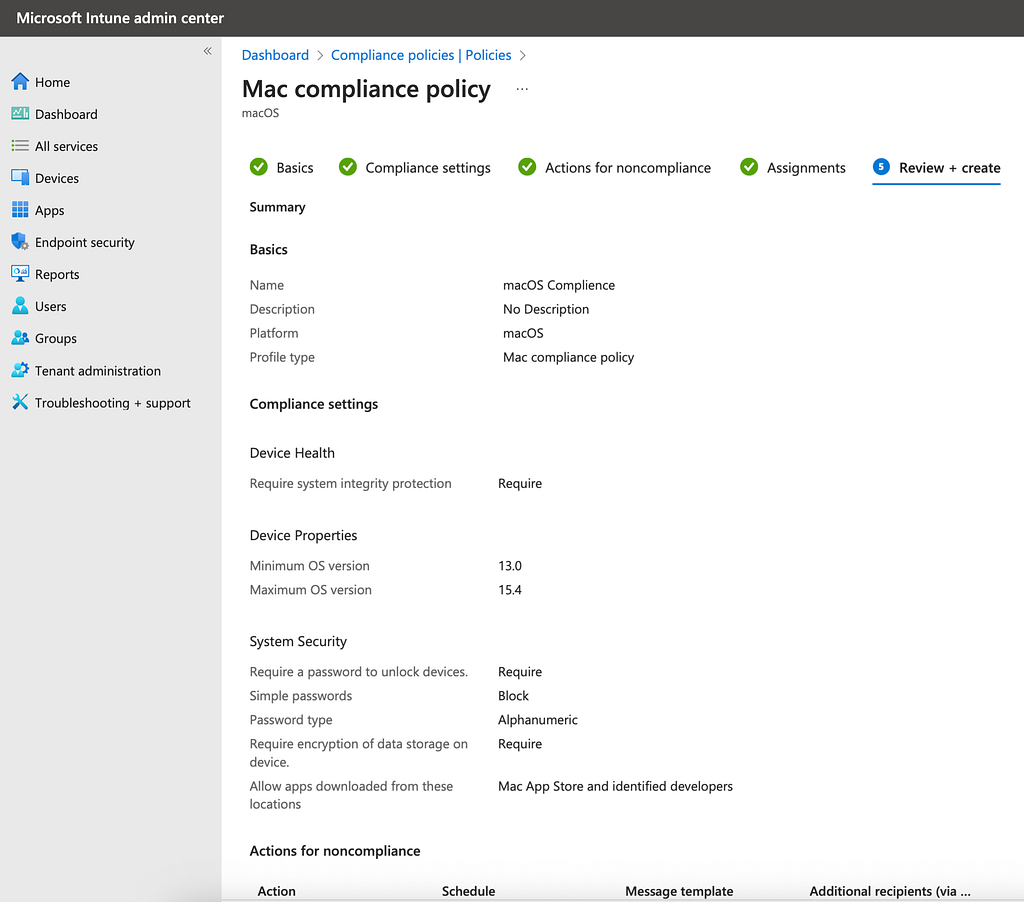
To create a Compliance Policy for macOS devices with Microsoft Intune, first click the Create Policies button in the Device Compliance section in the Dashboard area of Intune to create your first policy. If for any reason you do not see a section named Device Compliance in the Dashboard area, you can also go to Devices > Manage Devices > Compliance to create your first Compliance Policy.
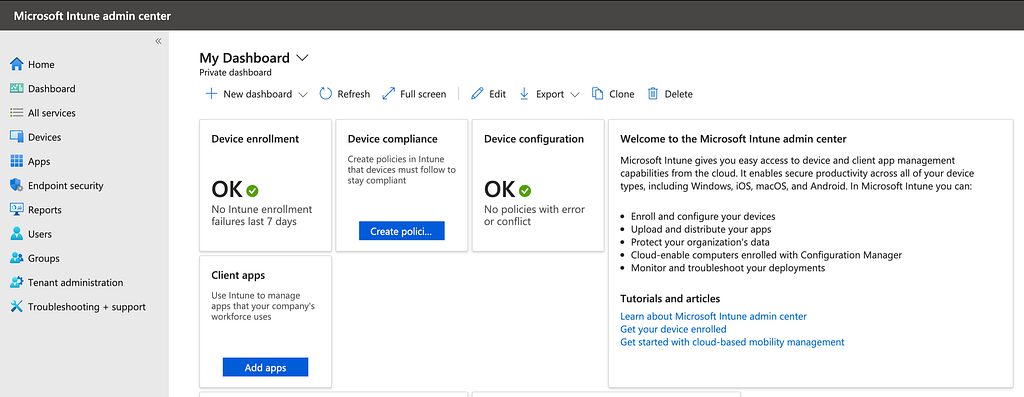
When you access the Compliance Policies section, you can start by clicking the + Create Policy button to create a new policy.
You can select the platform you will manage from the new screen that opens on the right. Since we are creating a macOS Compliance Policy here, we select macOS from the platform section. Since only one profile type can be used on all platforms listed except Android Enterprise, we don’t need to make a selection from the Profile Type menu. We can create our policy by clicking the Create button below.
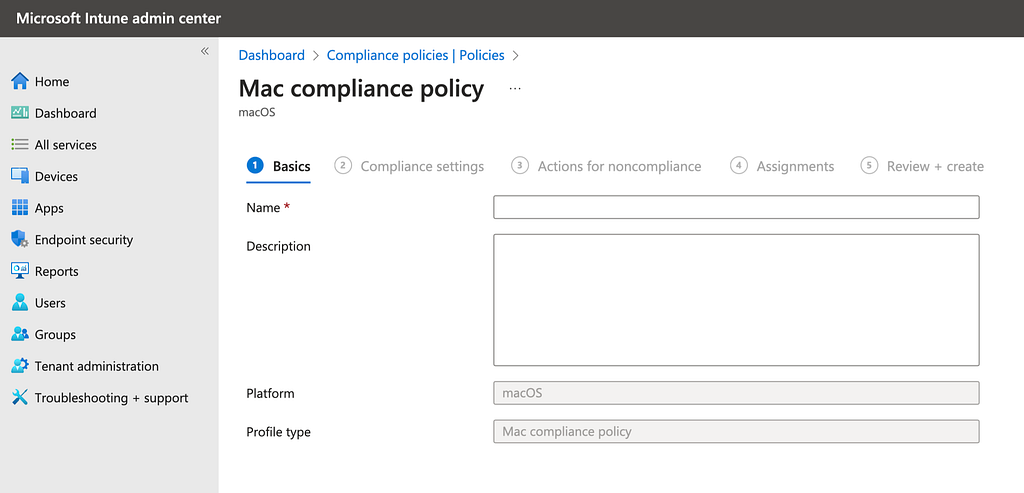
As you can see on the page that opens when you click the Create button, we can create our first Compliance Policy in just a few steps.
We start by giving our policy a name in the Basics section. Filling in the Description section is not mandatory. You can skip it if you wish. But I would like to make a small note here. You can create multiple Compliance Policies within Intune. In fact, you may need to use more than one Compliance Policy even for your macOS device fleet. For example, you may want to include Filevault being enabled in one group and disabled in another group in your Compliance Policy. For scenarios where you proceed with such differentiated scenarios, a two-line explanation in the Description section can be very helpful to you in the future.
After the naming process, you can proceed to the next step by clicking the Next button at the bottom of the page.
Compliance Settings
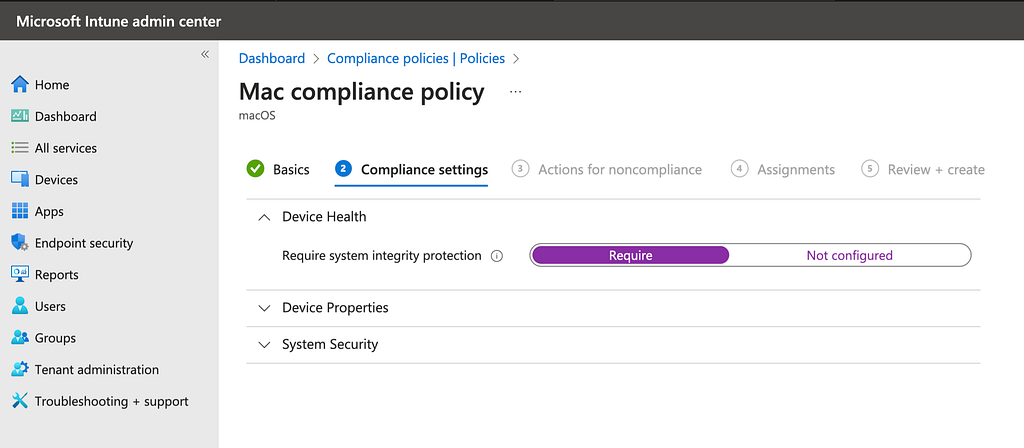
When you open the Compliance Settings page, where we will define our compliance criteria, you will see three main headings.
• Device Health
• Device Properties
• System Security
Device Health
The only option under the Device Health heading relates to SIP, or System Integrity Protection. SIP is a topic for a separate blog post, but let’s briefly explain what it does. SIP is a macOS security feature that protects specific folders of the operating system from various interventions. When SIP is enabled (which is the default setting), even root-privileged users cannot access or interfere with certain system areas.
SIP is enabled by default, as I mentioned above. If you want to disable it, you can do so using Terminal via the macOS Recovery.
If you have prevented your users from accessing the macOS Recovery (using Filevault, Recovery Lock, or Firmware Password for Intel devices), then you don’t need to worry about SIP. This is because users cannot disable SIP on their own.
However, if you still want to include SIP usage in the Compliance Policy, you can move the key to the Require section.
Device Properties
Under the Device Properties section, you can specify the minimum and maximum macOS versions and Build Numbers for the devices you manage. For those unfamiliar with the Apple ecosystem, here’s a quick note about operating system versions. When Apple releases a new operating system version, end users upgrade to it much faster than with other operating systems. Therefore, users of Apple devices are generally in close proximity to each other in terms of macOS versions. Even if, as an IT administrator, you want to prevent users from upgrading to a new macOS version through your MDM, you will encounter Apple’s 90-day upper limit. Apple users will be granted the right to update their systems starting on the 91st day.
You can specify the minimum and maximum macOS versions that devices in your fleet can support by entering version numbers such as 13.0 and 26.2. To determine this, it is helpful to know the production years of the devices in your Mac fleet and which operating systems they can support. I recommend bookmarking https://support.apple.com/en-us/109033 to follow the official list of which macOS versions are compatible with which hardware. The current macOS version, macOS Tahoe, is roughly compatible with hardware from 2019 and later.
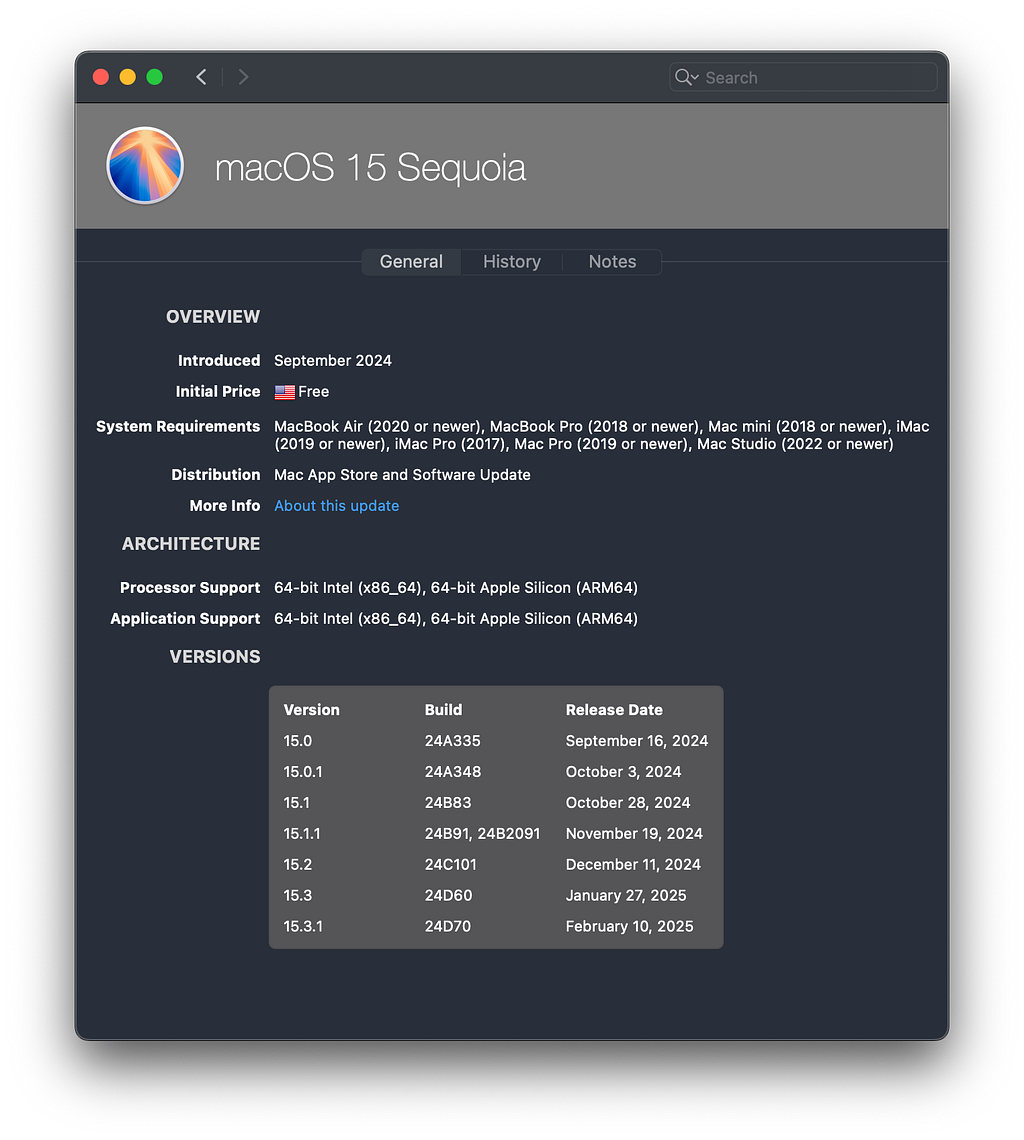
If you want to make a more specific distinction and use Build Numbers, you will need a list of macOS versions’ Build numbers. You can find this with a quick Google search. But let me take this opportunity to mention a useful tool that has been the favorite of the Mac community for years. With a small application called MacTracker, you can access all the technical information about all the hardware and software Apple has produced in its history. Below is a list of macOS Sequoia version Build numbers taken from MacTracker. You can download MacTracker for Mac and iPhone.
System Security
In the third section, System Security, you can find various security hardening features. The first category here is the Password field, where you can set basic password requirements.
You will find the basic password requirements you are familiar with from many device management systems in this area as well. Password length, requirement for alphanumeric characters, password validity period, etc. If a device currently has a password that differs from the password requirements specified under System Security > Password, it will be considered Compliant by Intune. Until the next password change.
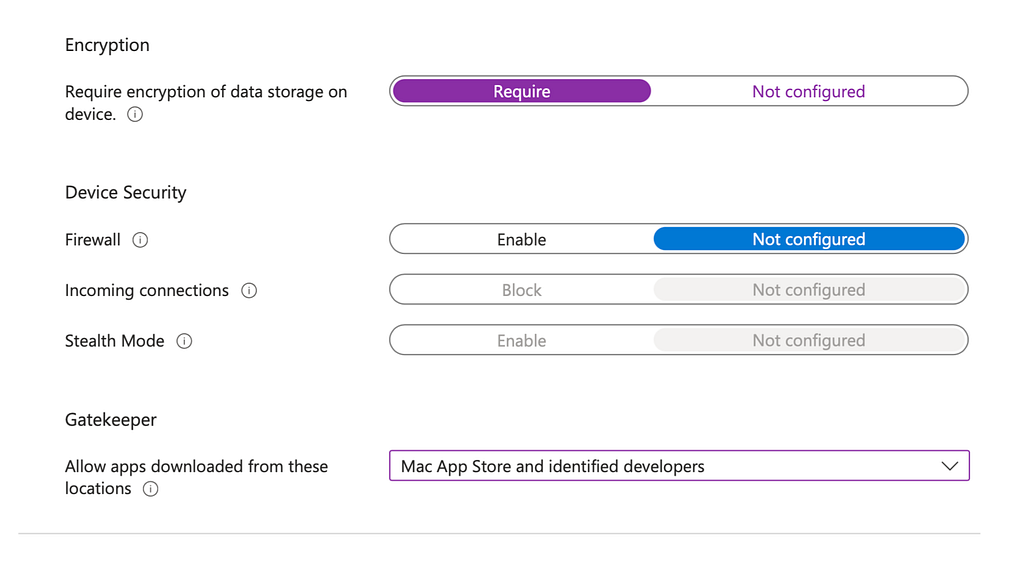
The only option under the Encryption heading relates to whether FileVault full disk encryption is present on the device. Since FileVault is a security layer that affects many aspects of the operating system, its use is recommended in corporate environments. In this context, I would recommend configuring FileVault through Intune and adding it to the Compliance Policy.
The next heading, Device Security, contains various settings related to the Firewall feature within the device. You can choose from basic settings such as whether the Firewall is on/off, whether incoming connection requests should be approved/disapproved, and whether Stealth mode should be on/off.
As another best practice, I would recommend keeping the Firewall settings within Compliance Policies disabled. This is because many corporate environments use third-party solutions for Firewall, and the Firewall features at the endpoint are disabled. Therefore, unless you intend to configure Firewall settings from within macOS, I would not recommend including Firewall settings in the Compliance Policy.
The final option in this area is the Gatekeeper section. Gatekeeper is one of the security features of the system that determines which sources can be used to safely install applications on macOS. In macOS, the Allow Applications From section in the Privacy & Security section of the System Settings application can be used to determine where applications can be installed on that computer. There are two options available in that area:
- App Store
- App Store & Known Developers
If the App Store option is selected, only applications downloaded from the App Store will run on that Mac. If you set the Gatekeeper setting to App Store, you will not be able to run applications such as the Google Chrome web browser on your computer. This is because Google Chrome can be downloaded from Google’s website, not from the App Store.
If the App Store & Known Developers option is selected, applications from all developers who have registered themselves as developers with Apple and joined the Apple Developer Program can be installed on that Mac. Regardless of where they were downloaded.
Under normal circumstances, the Gatekeeper setting can be sent to computers managed via MDM. Users cannot bypass this. In Intune, this can be done via Devices > Manage Devices > Configuration > New Policy > Settings Catalog > System Policy Control. However, if an MDM administrator has not included this setting in their own settings set, users can access the Privacy & Security section in the System Settings application on their own computers and make their own selections. Furthermore, if they are an Admin user with permission to use sudo commands, they can bypass Gatekeeper and add the Anywhere option as a third item to that list.
Therefore, it would be correct to specify the application installation source that has been decided upon at the corporate level within Intune via System Policy Control and to repeat the same setting within Compliance Policy.
Actions for Noncompliance
After specifying our preferences in the Compliance Settings step, we can click the Next button to specify our preferences regarding what actions to take on devices that do not meet these criteria.
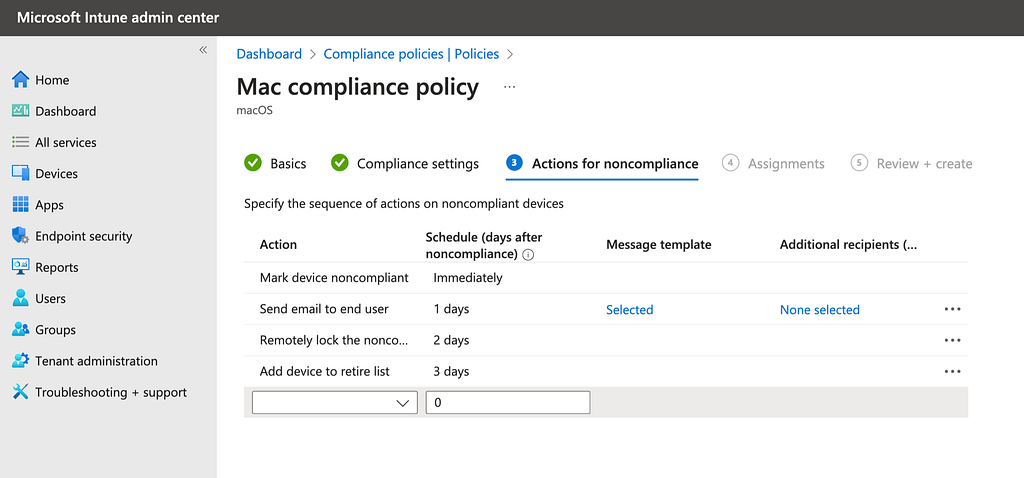
There are a total of 4 actions that can be taken from this area:
Mark Device Noncompliant
This action occurs automatically, and any device that is not compliant with the defined policies is immediately marked as Noncompliant. The compliance or non-compliance status of devices can be viewed in the Devices > Compliance section.
Send email to enduser
Information about a computer marked as non-compliant can be provided to the user via email. You can send this email immediately or X days later. Before selecting this option, you must prepare the notification message in Endpoint security > Device compliance > Notifications > Create notification.
Remotely lock the noncompliant device
Used to remotely lock a device that is non-compliant with policies. The device is locked, and the user can only reactivate it by entering a PIN code. This action can be applied immediately or after X days.
Add device to the retire list
This is used to remove a device that is non-compliant with policies from MDM and delete all policies and configurations sent to the device via MDM. This action can be applied immediately or after X days.
Assignments
The users or groups to whom the specified Compliance Policy settings and actions to be taken can be applied can be determined in the Assignments step.
The users or groups affected by the Compliance Policy can be selected from the Included Groups section in this area. The groups to be excluded can be specified in the Excluded Groups section below this area. For example, you can say, “The Compliance Policy should affect all users, but the Human Resources group should be excluded”
Review + Create
In the final step, you can view and review a general list of everything you have done so far and create the Compliance Policy.